
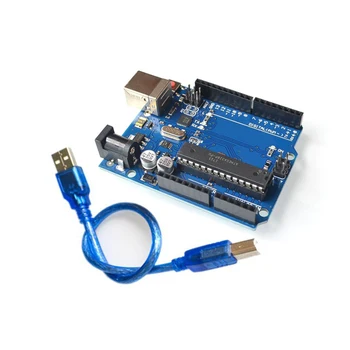
list of products from Amazon (Not mine, i just link them!) Scroll Down For Article! Note: Elegoo boards are not Arduino, but they are compatible with Arduino IDE and are mutch more affordable!


Description:
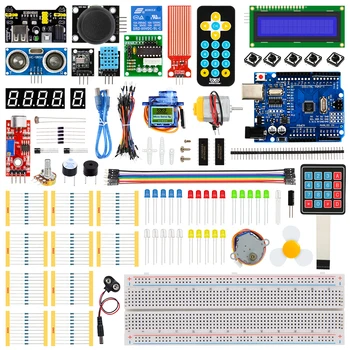
Dive into the world of Arduino with these five beginner-friendly projects that you can simulate online! From controlling LED brightness and counting numbers on a 7-segment display to measuring signal frequency with an LCD, these hands-on tutorials are perfect for electronics enthusiasts and aspiring makers. Each project is explained step-by-step, complete with detailed code and descriptions, making it easier than ever to learn Arduino programming and circuit design. Whether you're exploring shift registers, PWM, or LCD interfacing, these projects will help you build your skills and inspire your next creation. Perfect for beginners eager to experiment and learn!
Arduino UNO 7 Segment Display using a register shifter

This Arduino code demonstrates how to control two 7-segment displays efficiently using a shift register, reducing the number of required output pins. The program communicates with the shift register through three defined pins: dataPin (A5), clockPin (A4), and resetPin (A3). The numbers array contains the byte representations of digits 0 through 9, which are used to illuminate the appropriate segments on each display.
In the setup() function, the data, clock, and reset pins are initialized as outputs to communicate with the shift register. The loop() function cycles through the digits 0 to 9, displaying each number on the first 7-segment display while simultaneously showing the subsequent number on the second display. This creates a dynamic counting effect across both displays. The displayNumber() function is responsible for resetting the shift register and sending the correct data to each display, ensuring accurate representation of the digits. The shiftOut() function handles the actual transfer of data bits to the shift register, activating the specific segments needed to display each digit.
This project serves as an excellent introduction to using shift registers for efficient digital output control. It provides a practical and hands-on way for beginners to learn about reducing pin usage, interfacing 7-segment displays, and managing data flow in Arduino-based electronics projects. It’s a fun and educational way to explore key concepts in embedded systems and digital electronics.
Frequency counter Arduino UNO

This Arduino code showcases how to measure and display the frequency of a digital signal using a Liquid Crystal Display (LCD). The program leverages the LiquidCrystal library to handle LCD functionality, initializing it with predefined pins for communication. The primary task is to measure the frequency of a signal connected to the signalPin (A0) by counting the incoming pulses and calculating their timing.
In the setup() function, the signal pin is configured as an input to detect the digital signal's pulses, and the LCD is initialized to display a static label on the first row, indicating that it will show frequency measurements. The loop() function continuously monitors the state of the signal pin. When a HIGH signal is detected, the program records the pulse's start time. Once the signal transitions to LOW, the pulse's duration is calculated, and the pulse count is incremented. Using this data, the frequency of the signal is computed in Hertz (Hz) and displayed dynamically on the second row of the LCD.
This project is an excellent introduction to frequency measurement, LCD interfacing, and timing in Arduino programming. It gives electronics enthusiasts a hands-on opportunity to explore practical applications like pulse counting and signal analysis. Perfect for beginners, this project combines theory and practice to build foundational skills in embedded systems and signal processing.
Simple Arduino UNO counter

This Arduino code provides an interactive way to control a 7-segment display, allowing users to cycle through numbers 0 to 9 using a button press. The segmentPins array specifies the Arduino pins connected to each segment of the display, while the buttonPin variable is assigned to an analog pin that monitors the button's state. Additionally, the numbers array stores the byte representations of digits 0 through 9, which determine which segments are activated to display the corresponding numbers.
During the setup() function, the segment pins are initialized as outputs, and the button pin is configured as an input. The loop() function continuously monitors the button's state to detect presses. When a button press is registered, the displayNumber() function is called to illuminate the appropriate segments on the 7-segment display, showing the current counter value. The counter increments with each press and resets to 0 once it surpasses 9, creating a seamless counting system.
This project is an excellent starting point for beginners exploring Arduino programming, interfacing with 7-segment displays, and handling button inputs. It provides a straightforward yet rewarding introduction to these essential concepts, offering hobbyists a fun and educational hands-on experience in electronics and coding.
Arduino UNO multiples of 3 project for beginners

This beginner-friendly Arduino Uno project combines a Liquid Crystal Display (LCD) and an LED to create a simple yet engaging embedded electronics demonstration. The program counts from 1 to 100 on the LCD while controlling an LED, making it a great way to learn about interfacing and control with Arduino. Additionally, the project includes a welcoming message encouraging users to subscribe to the YouTube channel Easy Electronics for more tutorials on embedded systems.
In the setup() function, the LCD is initialized for a 16x2 display, and an introductory message is displayed to greet the user. The loop() function handles the counting logic, incrementing numbers from 1 to 100 and updating the LCD in real time. As an added feature, every time the count reaches a multiple of 3, the LED connected to pin 13 blinks for one second, providing visual feedback alongside the display. Once the counting is complete, the LCD shows the final count and the total number of LED blinks.
This project is an excellent introduction to working with LCDs, controlling LEDs, and understanding basic Arduino programming concepts. By combining these components, it offers a hands-on opportunity for beginners to build an interactive and practical circuit, sparking curiosity and enthusiasm for embedded electronics.
Code:
Make your own potentiometer with Arduino UNO
This Arduino code provides an intuitive way to control the brightness of an LED using a potentiometer. The potentiometer is wired to analog pin A0, acting as the input device, while the LED is connected to digital pin 6 as the output. By reading the analog value from the potentiometer (ranging from 0 to 1023), the program maps this input to a corresponding value between 0 and 255. This mapped range aligns with the requirements of the analogWrite() function, which uses Pulse Width Modulation (PWM) to control the LED's brightness—where 0 represents the LED being completely off, and 255 signifies maximum brightness.
In the setup() function, the LED pin is initialized as an output, preparing it for signal control. The loop() function handles the core operation by continuously reading the potentiometer's input, mapping it to the correct brightness range, and adjusting the LED's brightness via PWM. To ensure smoother operation and prevent excessive processor usage, a brief delay is incorporated after each reading.
This project serves as a perfect introduction to working with analog inputs and PWM in Arduino. It offers a hands-on opportunity for beginners to explore foundational concepts in electronics and programming while building a practical and interactive circuit.
schematic:

list of products from Amazon (Not mine, i just link them!)
Please NOTE that ELEGOO is not Arduino but it is compatible with Arduino IDE, and mutch cheaper!

CanaKit Raspberry Pi 5 Starter Kit PRO - Turbine Black (128GB Edition) (8GB RAM)


![Arduino Uno Rev3 SMD Microcontroller Board [A000073]](https://m.media-amazon.com/images/I/61nFCzNYYcL._SX522_.jpg)
![Arduino Leonardo with Headers [A000057]](https://m.media-amazon.com/images/I/51+8ABu0kRL.jpg)
![Arduino Nano 33 IoT [ABX00027]](https://m.media-amazon.com/images/I/51Uhh2bmDXL._AC_SX466_.jpg)


0 Comments